

I'm stoked to share this week's project because it's one that took me literally all of about 15 minutes, and costs next to
nothing. For a long time after I started sewing, I was scared to make anything from scratch, so I started with refashioning. Basically, you take a piece of clothing and you... refashion it! Haha. Take to it with a pair of scissors... add a trim, change the neckline, add sleeves, add a ruffle! You just make it your own. :) It's always an adventure and now whenever I go to a thrift store, I feel like I'm on a treasure hunt for pieces with potential to be refashioned into something fresh and new.
So, for this refashion, I took a simple $3.80 basic tee from Forever 21 and added an eyelet ruffle hem to the bottom. Easy peezy. All it takes is a cut, a hem, and a single seam. Yep, that's it.
And you end up with a slightly different take on the classic tee... it's just as easy and comfortable to throw on as a tee, but looks like you put way more effort into getting ready-- which I now realize will be key for me as a new mama. Easy to throw on, but still makes me feel like a functioning human being ;)
All you'll need for this project is a t-shirt (I got mine in a size up to give it a looser fit) and a yard-ish of eyelet trim (mine was about 7" wide). I have a feeling I'll be running to Forever 21 again pretty soon here to grab a few more tees in other colors!
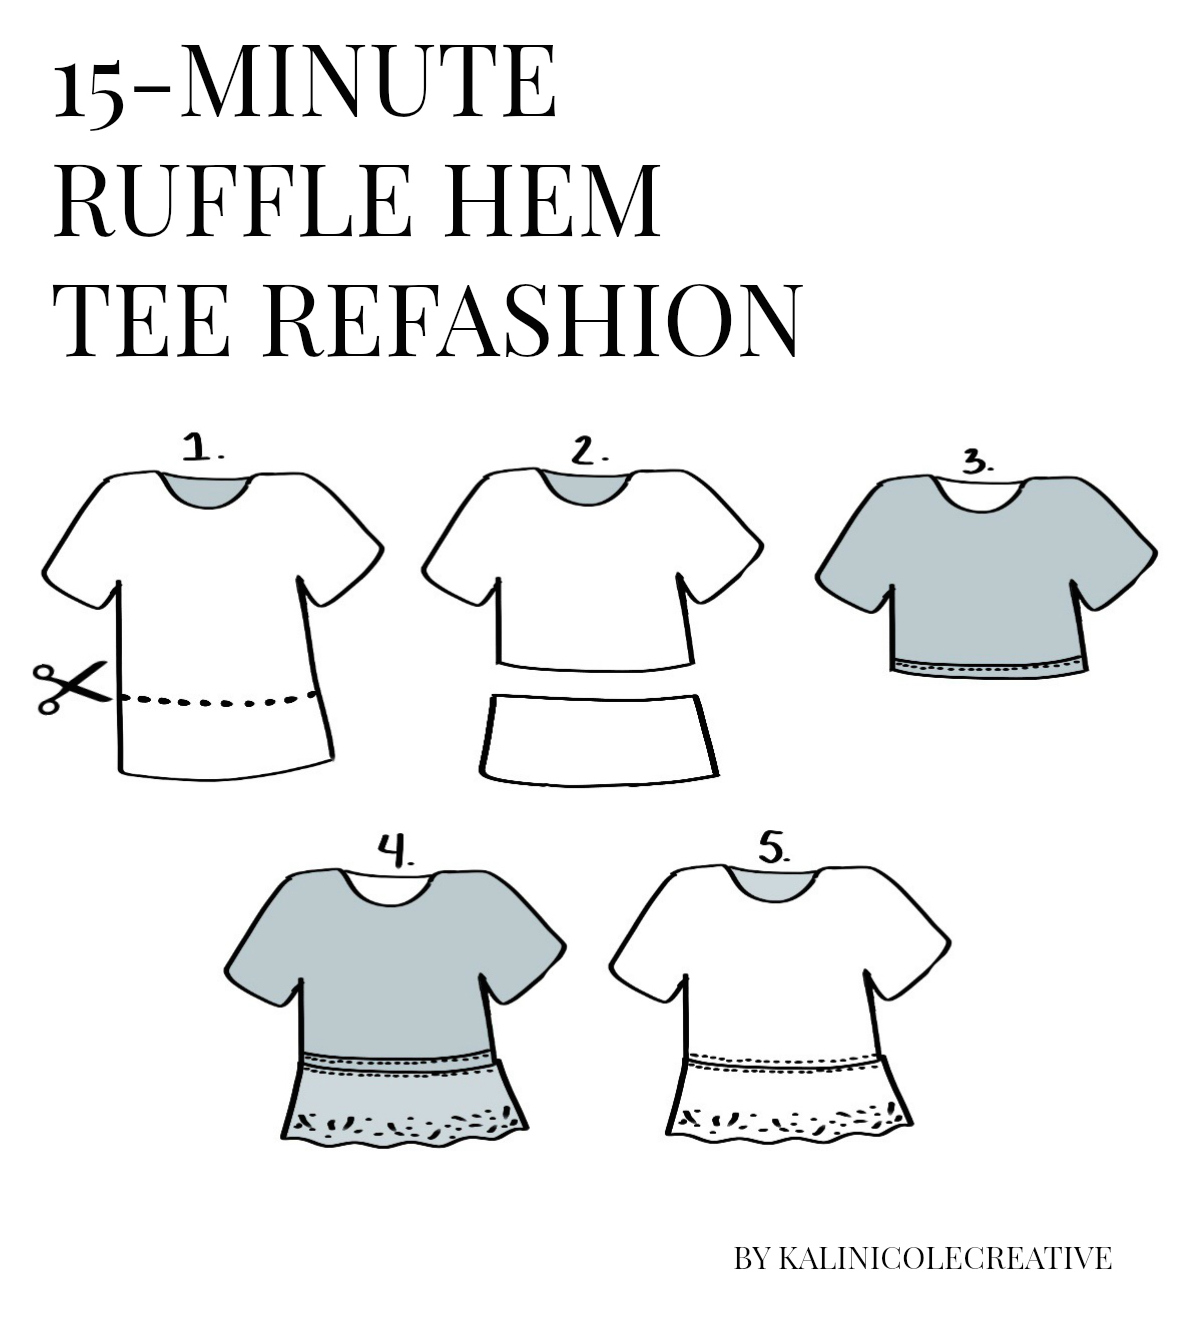
Anyway, read below for the easy instructions on how to make this 15 Minute Ruffle Hem Tee Refashion. :)


______________________________________________________________
- 1 1/2 yard eyelet trim (I used 7" wide)
- Basic tee (I went up one size)
- matching thread
INSTRUCTIONS:
STEP 1: Using a dress form or your own body, decide where you want the flounce/ruffle hem to start, and mark accordingly.
STEP 2: Take off the t-shirt and lay out flat on cutting mat. Using a straight edge ruler, cut off the bottom portion of the shirt (adding about 1 1/2 inch for hem).
STEP 4: Pin the eyelet hem to the shirt's new hemline (with shirt still inside out.. pin the wrong side of shirt, with eyelet facing out). Sew the eyelet to the t-shirt's hem.
STEP 5: Turn shirt right-side-out and iron where the eyelet was attached to the shirt's hem. To finish, top stitch.


This is really pretty, I love a quick simple refashion
ReplyDelete