It wasn't a day full of grand outings, lavish living, or anything of the sort. Nope. Just a day full of being outdoors, cuddles in bed, open windows, baby talks, holding hands, yummy food, a summer thunderstorm, long talks, and just... being present. Days like this, with my boys, are my favorite. I'm sure you know the feeling, right? Days when you remember to live life
slow. When you really decide to be right where you are, with your people.
I need to remember to do that more often, and maybe you do, too. :)
___
Anyway. Me Made May continues (if you don't know what I'm talking about, read this post!) And here's my second refashion for the month!
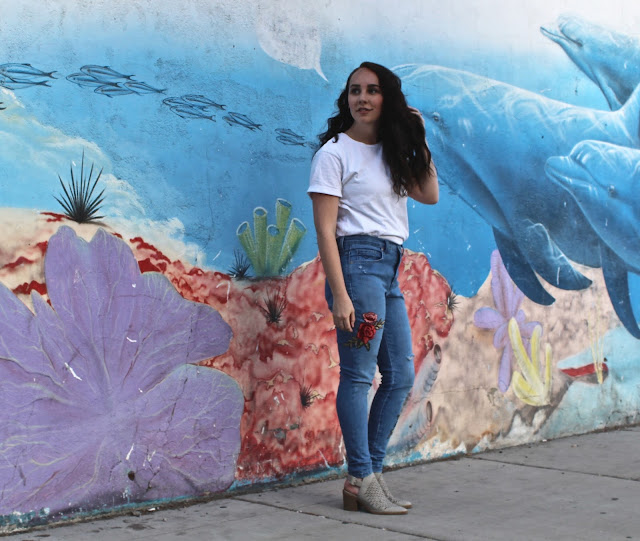
I was browsing Pinterest a week or so ago and stumbled upon these jeans. I was instantly in love. I have totally fallen for the embroidery trend this spring, guys. I'm all about adding a touch of feminine, intricate detail to basic pieces.
BUT, I also have a really hard time spending big chunks on "trendy" pieces... because, as we all know, trends come and go. And often, pretty quickly. So, DIYing or refashioning these trends yourself is a great way to save that money, while still flaunting these super fun looks.
I decided to peruse the web for some pretty floral appliques and I found these. Then I made my second (or third, or maybe fourth) trip to the thrift store that week and found this pair of light-wash, medium-rise jeans for $3. They were originally a straight leg, so I took them in to make them a skinny fit before adding the embroidery + distressing. I think I skinny-ified my first pair of jeans back in 8th grade, and I've been doing it to nearly every pair of jeans I've bought since. Even legit skinny jeans at the store I always seem to have to take in at the calf area. Taking in jeans can be intimidating the first time, but is surprisingly quick and easy. Do it once, and you can do it 100 times.
This whole refashion took probably a total of about 30 minutes, and is perfect for the beginning sewer and the non-sewer alike! These fun bottoms are perfect for summer nights -- at festivals, concerts, fairs, and around the bonfire. Ahhhh, Summer. I'm SO excited.
Read below for the full tutorial!
_________________________________________________________________________________
What you'll need:
- 1 pair of jeans
- floral appliques
- seam ripper, scissors, razor
- hot glue gun, fabric glue, or sewing machine to attach appliques
Kay. Here we go!
Step 1.
Turn your pants inside out and put them on. Stand in front of a mirror and begin pinning down the leg, to create the shape desired. Make sure the front and back layers of the pant on laying flat against eachother as you go.
Step 2.
Remove pants (be careful of the pins! Ouch!) Make sure that you have enough room at the ankle to easily get the pants over your feet! I've sewn the ends too tight before!
Step 3.
Lay pants out flat, still inside out, and using a colored pencil or tailor's chalk, create a line using the pins as your guide. Remove the pins and re-pin in the correct direction for sewing. Make sure to connect the line all the way up to make the pre-existing pant seam.
Step 4.
Sew along the line your drew, making sure that pant layers are laying flat to the seam, no "bubbles" or puckers.
Step 5.
Turn pants right side out and try them on. Make adjustments to fit as needed. Then turn pants back inside out and trim excess using pinking shears. (this will help prevent fraying!)
Step 6.
Step 7.
Once you have your appliques layed out, take pants off and attach appliques. You can do this a few different ways -- ironing (if appliques are iron-on), sewing, or glueing -- fabric or hot glue will work! I did a combo of sewing + hot glueing with mine.
Step 8.
Time to distress your jeans! My favorite method for this involves scissors, a razor, and a seam ripper. First, I use the razor to rub areas I want to look more worn/weathered. Just scrape sideways on desired areas with razor. Next, I create my holes. I typically do this by cutting a very small slit with scissors, the ripping the hole with my hands. This creates a more natural looking hole. Always create a smaller hole than you think you will want! Remember the hole will grow over time and with washes. After I've created the slit, I use the seam ripped to pull down/up the white threads that run horizontally through the denim. Be careful and go slowly! These will rip easily if you're not careful. Finally, I use the razor again to roughen up edges, pockets, seams, and around my holes.
Aaaaaaand that's it, folks! :)


Post a Comment