

I know I often start my posts referring to that given day being "one of those days." And over time and across those posts, I've used "one of those days" to mean a lot of different things. It's been used to refer to good days, bad days, crazy days & dreamy days. Mom life days and "this is my life??" days. But... for reals, guys. Today was one of those days. In the best, best possible way.
One of those days when you feel a spark, a light, a flame. An idea, a dream, an inspiration. When a tiny vision sprouts in your mind and over the course of a couple hours of thinking and dreaming and talking it out, that vision grows and blooms and can barely be contained in that head of yours. When, for once, your dream matches up with your husband's and you're in awe at how good it feels to both of you.
Those are the kinds of days you have to scribble about across the empty pages in your journal. The kind that make your
head spin and your heart buzz. The kind that scare you and thrill you at the same time. Today was one of those.
I can't share too much about it. Dang it! I know. I'm being that person who dangles a sliver of info in front of you but won't let you in on the whole deal. Sorry. Just know that it started with a greenhouse. A greenhouse we discovered down the road. The greenhouse I used to take these pictures (see, my ramble does relate to this refashion, somehow! ;) ) One day I'll look back and remember the afternoon that our big dream started in a greenhouse in May.
__
Kay. Enough of that. Down to the project at hand.
A couple weeks ago during one of my
Last week I was feeling down. Feeling... well, blue. And I caught a glimpse of that cheery blue gingham dress and decided it was just the ironic pick-me-up I needed. So I threw it on my dress form and made 100 sketches before taking to it with the scissors.
For this refashion, I went with something simple, understated, but also just happy and light and summery. And I'm oh-so-happy with the result. It's a light-weight, semi-stretchy fabric and combined with the new cut, length, and style... it's perfect for all those dreamy summer things like picnics & greenhouses & sunset walks. Yep. It's summer dreaminess in dress form.
Well, friends, I'm off to bed! After "one of those days" with perfect summer weather, an inspiring greenhouse, a cheery blue dress, and a seed of a dream. And all I can leave you with are these words, from me to you:
Believe in your ability to take something and make it your own -- a dress or a dream, or whatever it may be.
XOXO
**Keep reading below for full tutorial**


___________________________________________________________________________
What you will need:
- dress to refashion (preferably oversized / extra length to work with!)
- some kind of trim for the sleeves... mine was a thin ruffled eyelet trim

Step 1.
Cut your dress into three sections: top, skirt, and excess bottom.
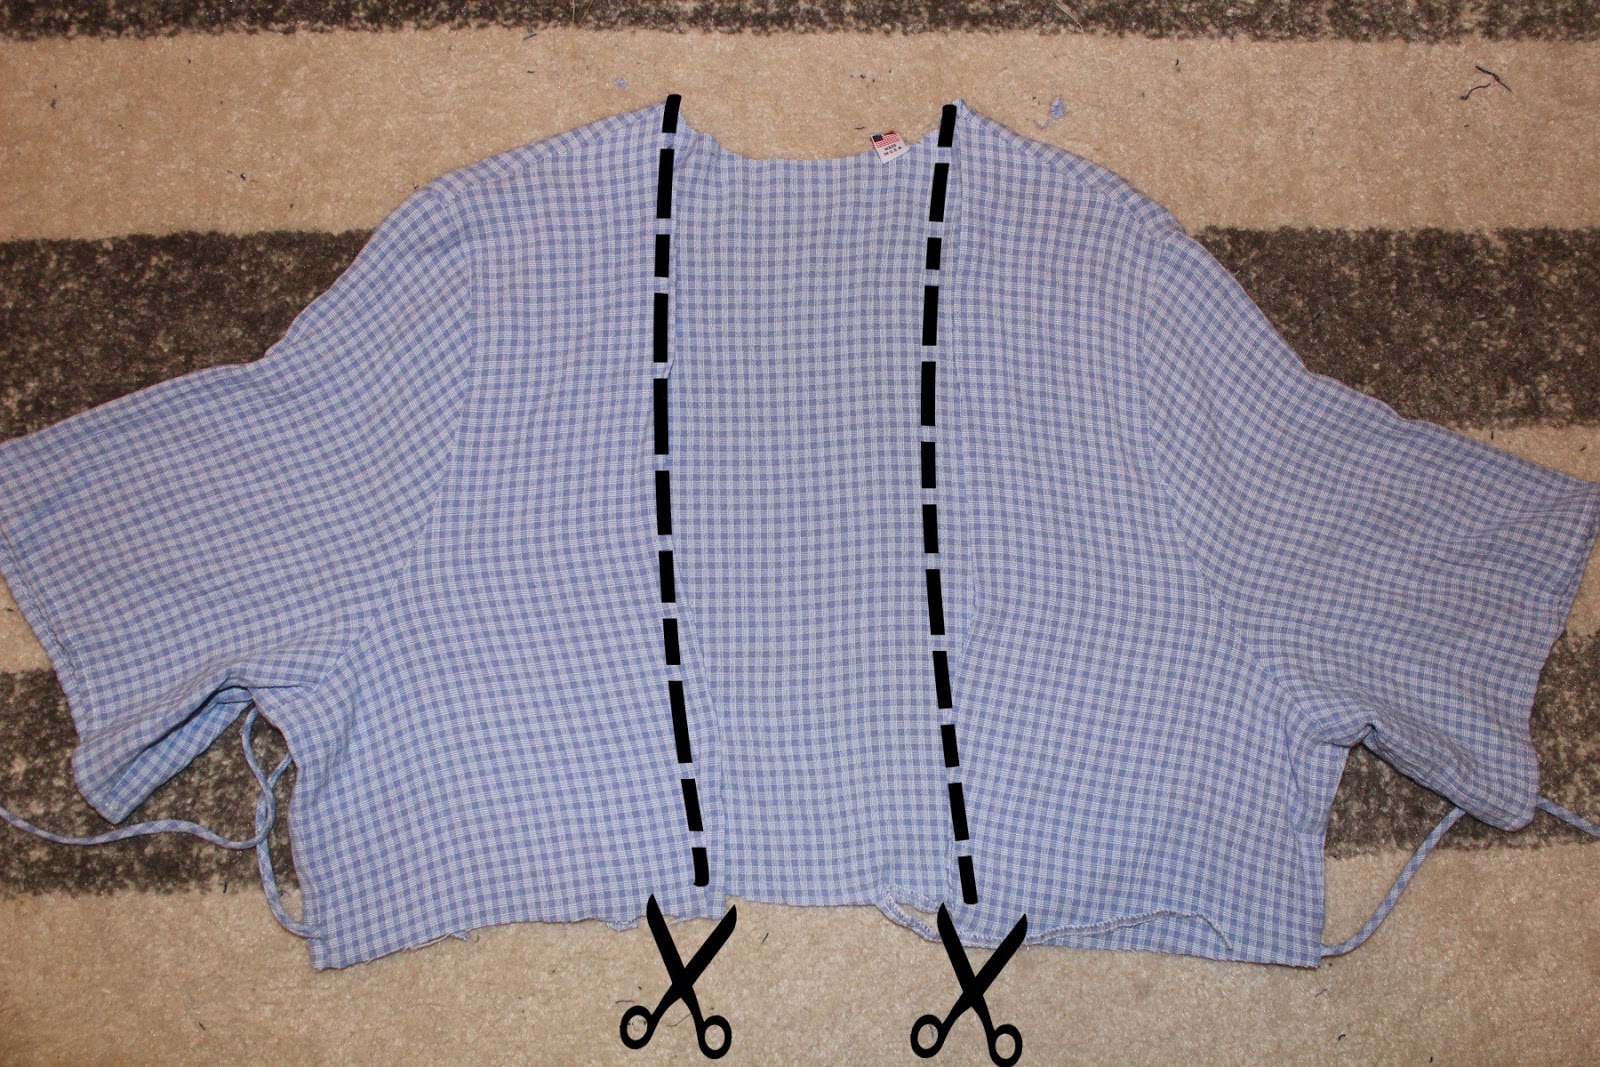
Step 2.
Take your top piece and cut out the middle section, from neckline to bottom, including the collar and button front.

Step 3.
Cut a new top middle piece using excess fabric.

Step 4.
Attach your new top middle piece to your top.

Step 5. (Optional)
Add darts to top piece, from armpit to midbreast on each side.

Step 6.
Line neckline. (Ignore weird shape in picture, go off the black outline!) Lay a piece matching the shape of the neckline on top of your dress, right sides together. Stitch. Turn facing to the inside of your dress and press. Topstitch if desired.

Step 7.
Add trim to sleeves. Pin & sew.
(I lost the pictures for steps 8-10, so sorry!:( )
Step 8.
Add your dress bottom to dress top, right sides together.
Step 9.
Try your dress on inside out. Pin along sides to alter fit/shape. Sew.
Step 10.
Hem dress, and you're done!


Post a Comment